Mazin- GO!
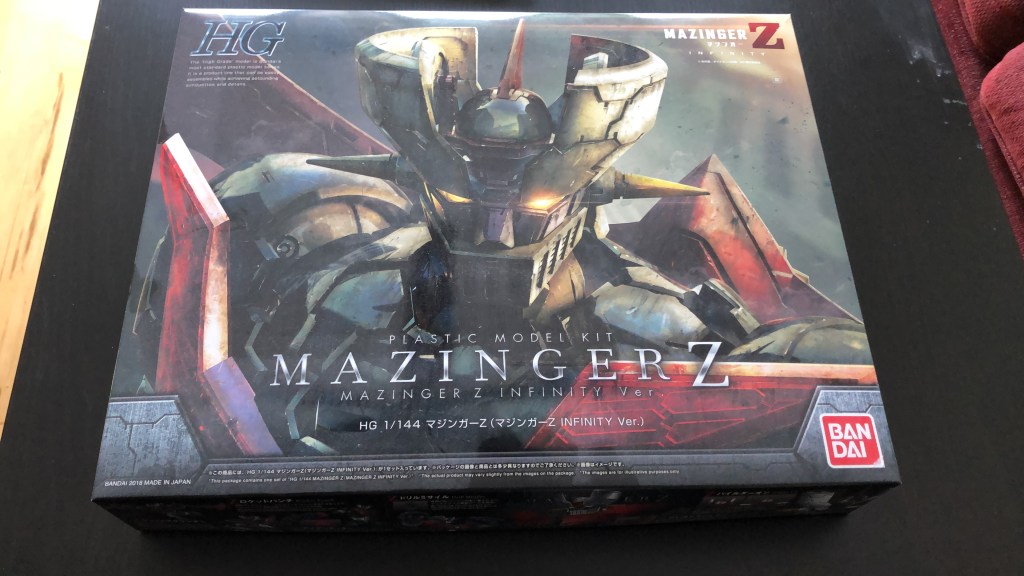
Okey, confession time. I had bought this model kit on a whim. It’s Mazinger Z Infinity Version, 1/444 scale from Bandai HG. It is based on the scale-like version from the Mazinger Z Infinity movie. I’ve been a long-time fan of the original show from back in the late 70’s. I’ve built countless crude replicas myself out of LEGO back during my childhood years.
I never thought I’d actually get into it and enjoy the actual build myself, but here we are all forced to stay home. With me having some time after work to kill, I’m thinking it’s time to get started. Now I don’t want to mislead you here. This is not a difficult task, but an enjoyable one. I’ve been told it would take most collectors about 4 hours to put this model kit together. I took my time and went one section at a time, chronicling each piece in Instagram. And setting up a workbench I could comfortable work on for days.

The beach towel was a thought from my LEGO days in which (not so long ago) I would be putting something together for a piece to escape underneath the sofa or disappear from sight. The towel prevented a few escapes. Settled in, and having acquired a basic tool set a while ago, I went about my first goal, the hover pilder.

I really wished I’d built that micro-sized ship once I had gained some experience cutting out some less iconic parts first! As you can probably tell, the wings fold. Getting them to snap in was already a bit of a challenge in which I’m sure I ended up loosening them. Either that or my rookie cutting them out has caused them to droop when held up. At least once the craft is atop Mazinger’s head it will stay there with no incident, but that will come later. Up next, Mazinger’s head…

I had almost the same anxiety issues here. I felt I wasn’t really ready to put it together. Lining up the nose with the mouthpiece took a couple of tries, but all in all it did felt a little easier than the hover pilder although it was made up of more parts. I can still see a bit of leftover plastic that was left in the antennas because I was still getting some experience with the nippers. Still, it was becoming rather enjoyable to work on the figure. Next up, the arm units.

The arm units have a ton of intricate parts. This figure is not a statue, it has poseability. The arms rotate and expand. The upper arms pivot, the elbows turn and bend over 45 degrees thanks to double joints. You can also see where the thruster is on the forearm for the rocket punch. The fists also turn and bend. There are alternate hands for the right hand to be more expressive, but none for the left. I would preferred one extra for each hand, but it’s not a deal breaker.

A close up on the arms. The forearms have panels that you need to remove and re-attach as if they had slid out of the way so that you can attach the iron cutters. Each joint that allows itself to be removed seems explicitly designed to do so. Just don’t expect the rocket punch to actually fire from the arm. There are additional terminals to simulate the drill missiles, but that’s coming up later. Up next, the leg units.

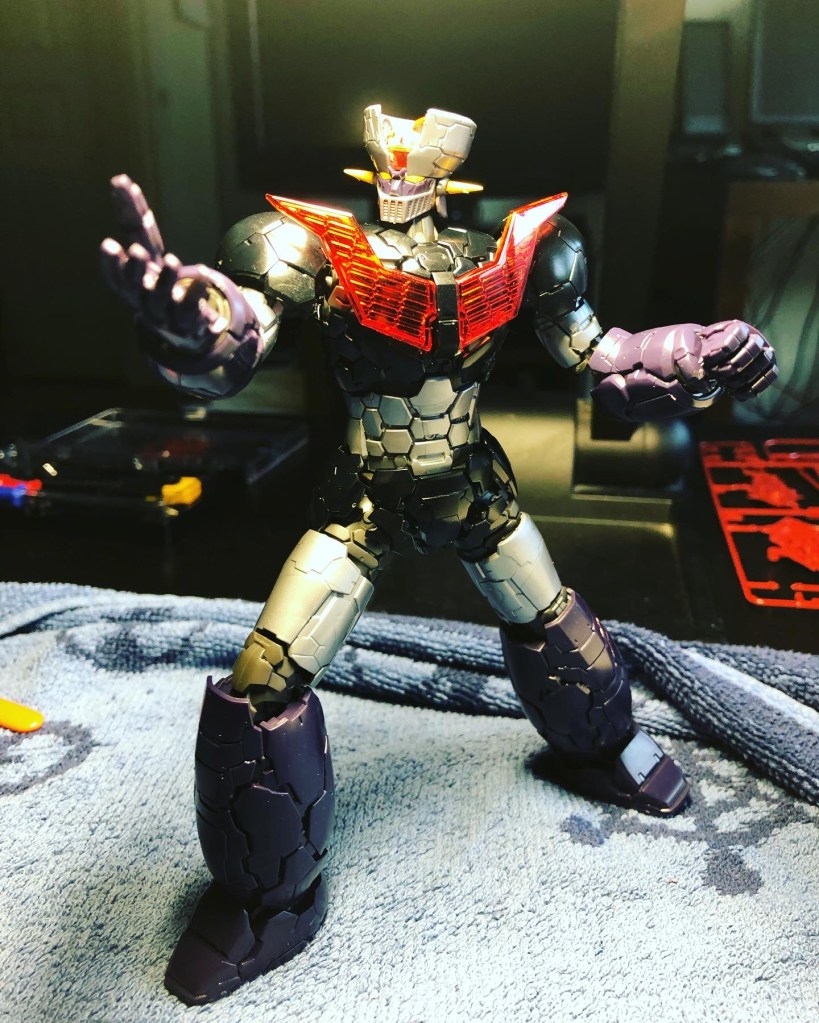
In typical fashion, the leg units are bigger than the arms and the head and considerably heavy. No diecast, but there’s enough to help you balance the figure when it’s standing up. The legs do have a little piece of the skirt at the ends that means that you’re going to have to move them around to get certain poses to look right. The feet do have some bend to allow for a balanced stand, just nothing crazy. Seeing these members strawn about, did gave me some Iron Giant vibes. Up next, the chest and torso.

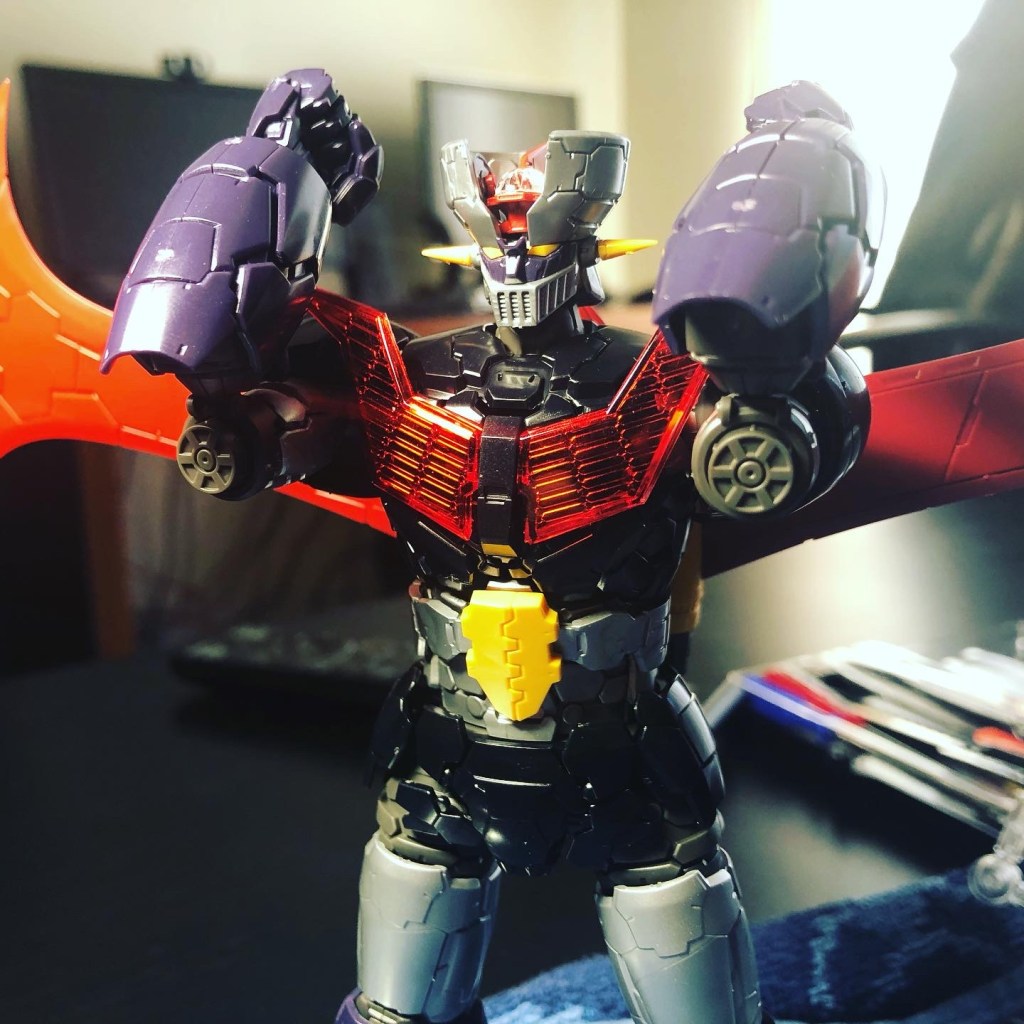
Impressively enough, there’s a slight bending at the middle section and the waist does turn. It’s not going to allow for any noticeable crouching, but it does help you lots to help balance the figure out, which you might need once the Jet Scrander comes on. The back has a piece you will have to remove to allow for that connection. At this point, I left the assembly for the next morning, although I was really tempted to see it.
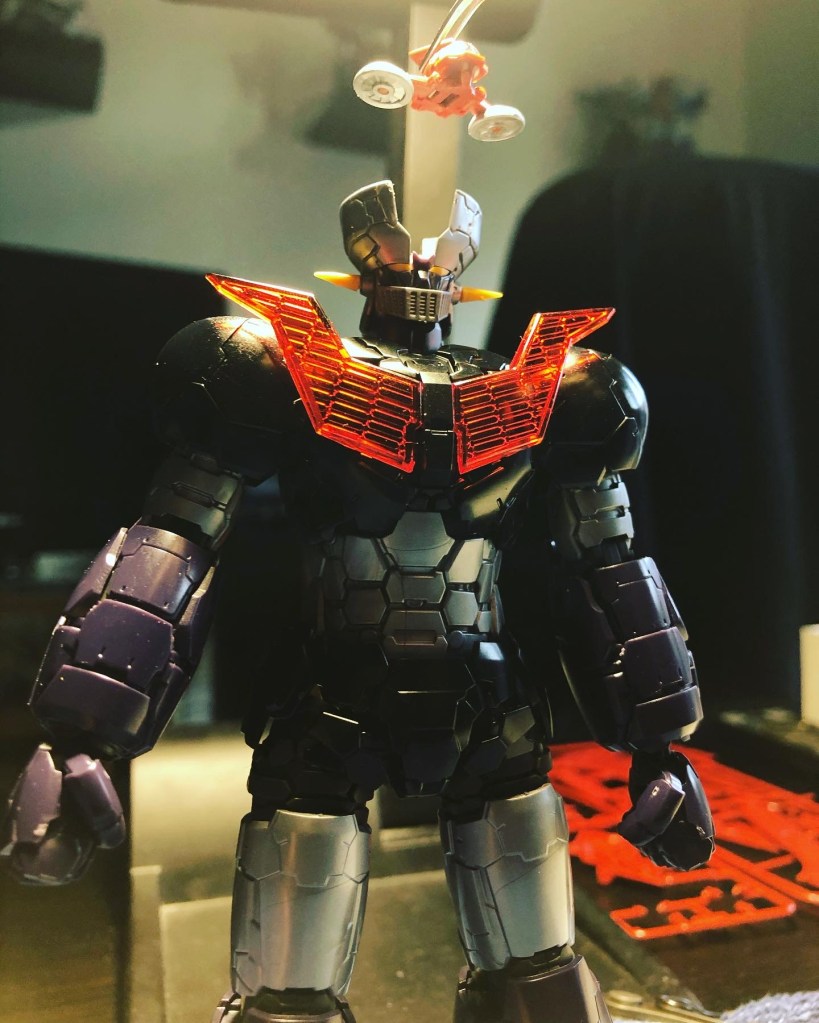


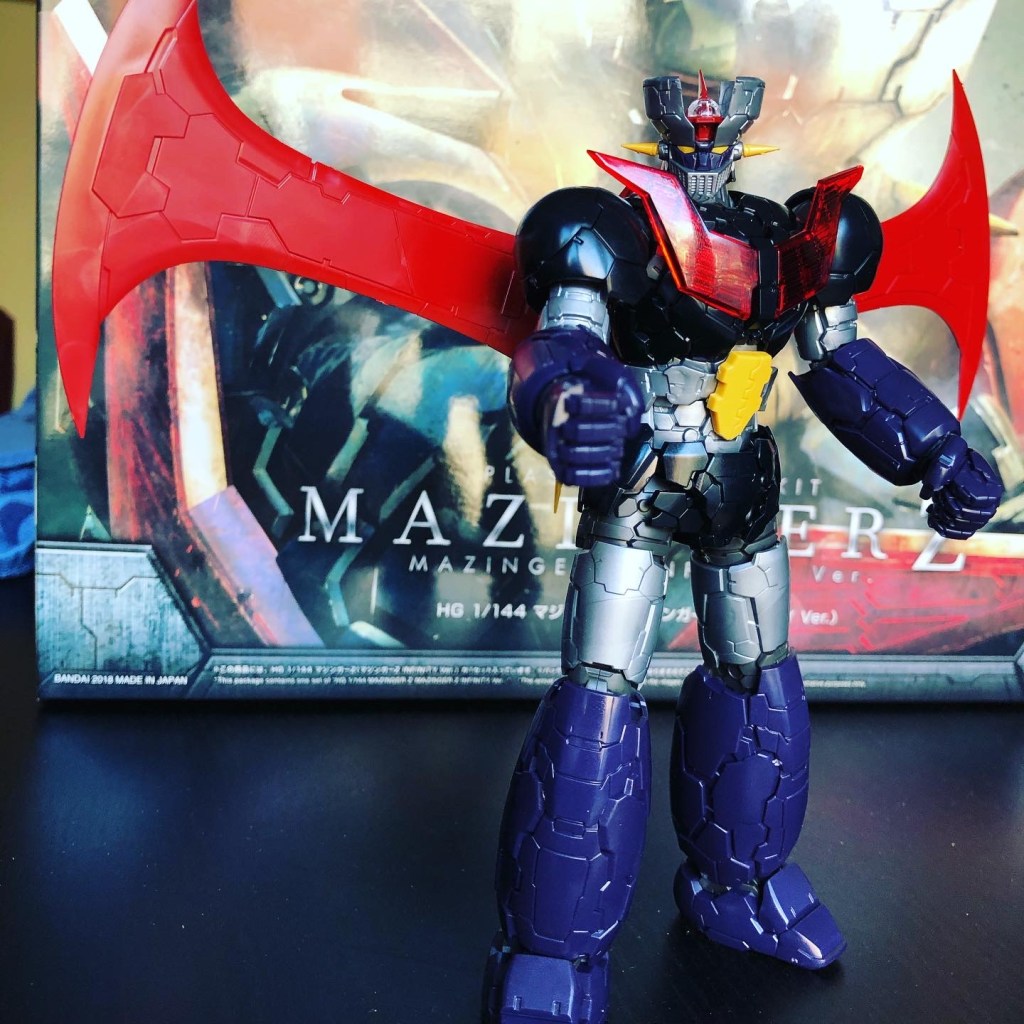
It is rather striking on photos, and looks really bigger than life. However, as you start to put it together you do realize that it is smaller than you thought. My point of reference is usually the masterpiece Takara Transformers, which are bigger. However, he does size up with my classic models of Mazinger Z and Afrodita A which we will see later. Of course, I wanted to get to the Jet Scrander, and that’s coming up next.

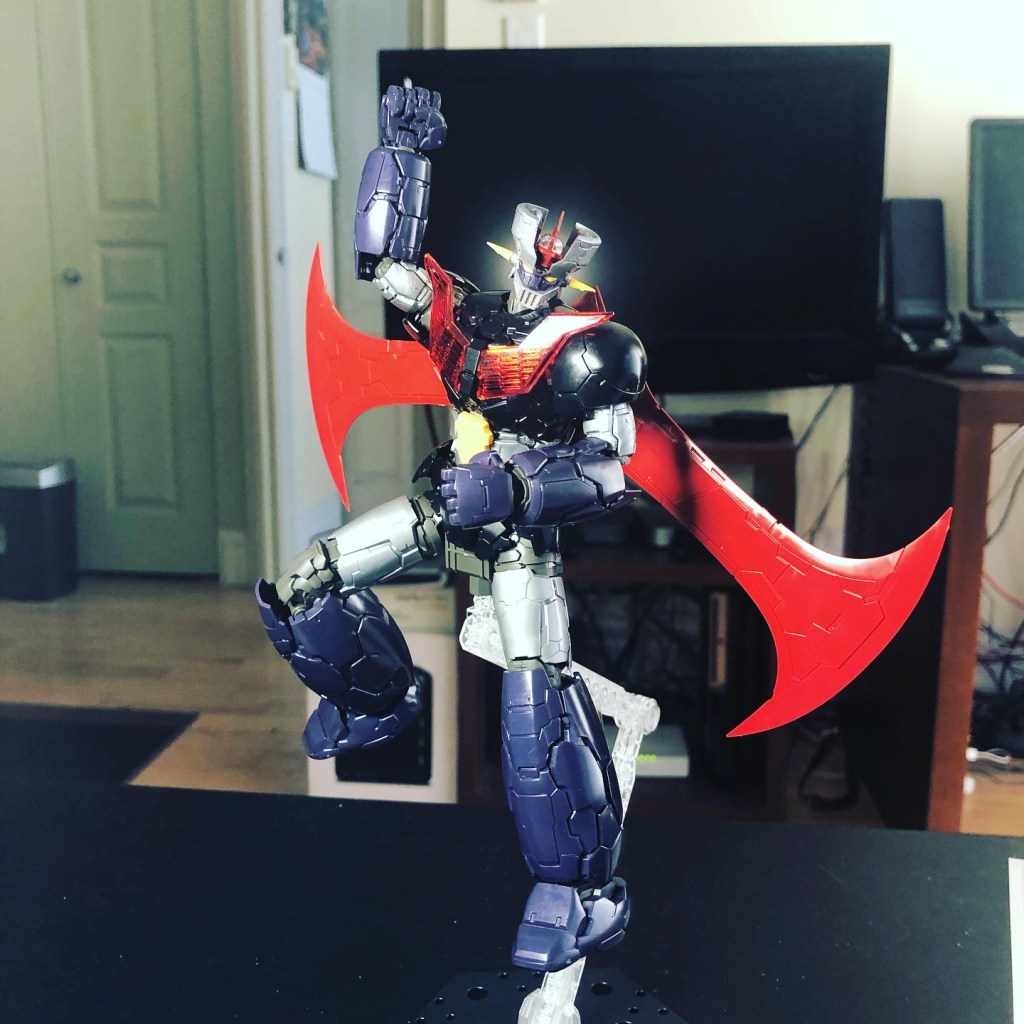
The Jet Scrander is simple yet striking. The wings can be angled slightly forward and backward. The belt does add some color and does stay on once set correctly. You can choose to pose him with or without it.


I’m not crazy about putting him in a semi horizontal pose for flight since the legs tend to pull him down. But if you use the stand to get him on a landing/takeoff pose, it does look quite good.
I also have to do the obligatory action poses for rocket punch, iron cutter and the drill missiles, of course. The rocket punch requires you to put an extra piece to hide the stub. Iron cutters are extra pieces that require the panels on the side to be moved as if they had “slid” out of the way. The drill missile pose is a specific piece that has to be added between the elbow and the forearm, it’s not there by itself.

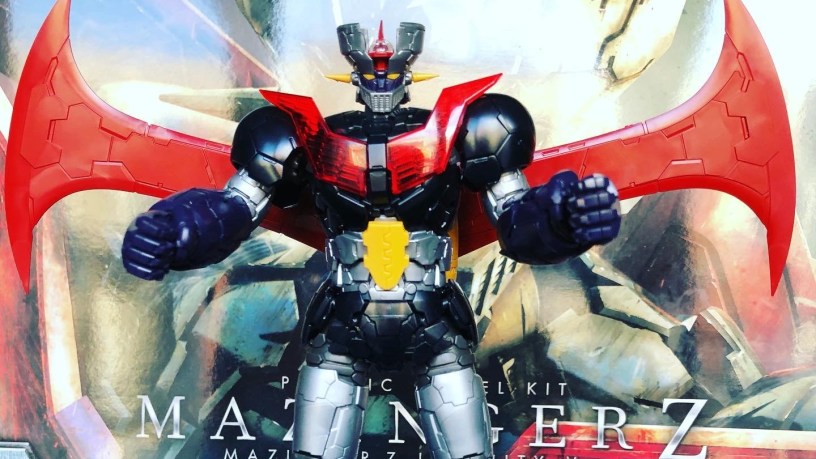
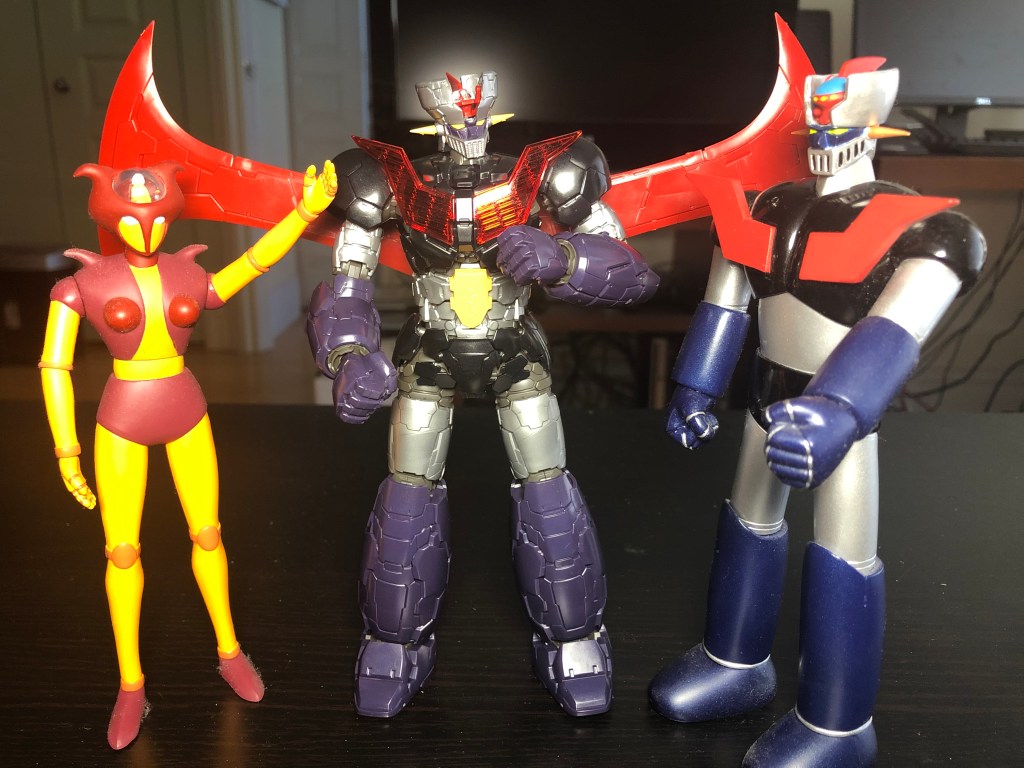
Finally, Mazinger Z Infinity had to meet the classic anime versions of Mazinger Z and Afrodite A because how could he not? He’s really an amazing figure to build, and I found myself almost sad to be done but satisfied. It’s also a great figure to get started building mecha and quite an addition to my desk.
Who knows… Perhaps I’ll consider getting into more building in the future. After all, it’s absorbing and something to get into while we’re all staying at home. I could consider getting into the Great Mazinger or the Mazinkaiser as future projects, but for now the classic Infinity version is a must-have for diehard fans of Mazinger Z.
That will do for now.
